
Dwellings of Eldervale Player Tray Covers
Survive Escape from Atlantis! Custom Expansion Kit
Information, Tips, Tricks and FAQ
Tray 2 Assembly - Shadows of Brimstone
Compatible with Shadows of Brimstone (© Flying Frog Productions)
Disclaimer: This is an accessory for the game, not a replacement. You will need to have a copy of the game to play. This project is in no way affiliated or endorsed by the publishers or trademark holders of the game.
For more information contact us at info@prawndesigns.com.
Please read the Laser Cutting and Engraving FAQ page for details on laser cutting and engraving side effects.
NOTE: All of the images are links. Click on any of the images to see a larger version in a new window.
Tray 2 Assembly Instructions
The trays that are compatible with Shadows of Brimstone (© Flying Frog Productions). They are kits not flat pack, aka they need to be glued together. The design is sort of complex. I hope these instructions will make it easier for you to assemble the trays. Note, tray 2 is a little easier to put together.
|
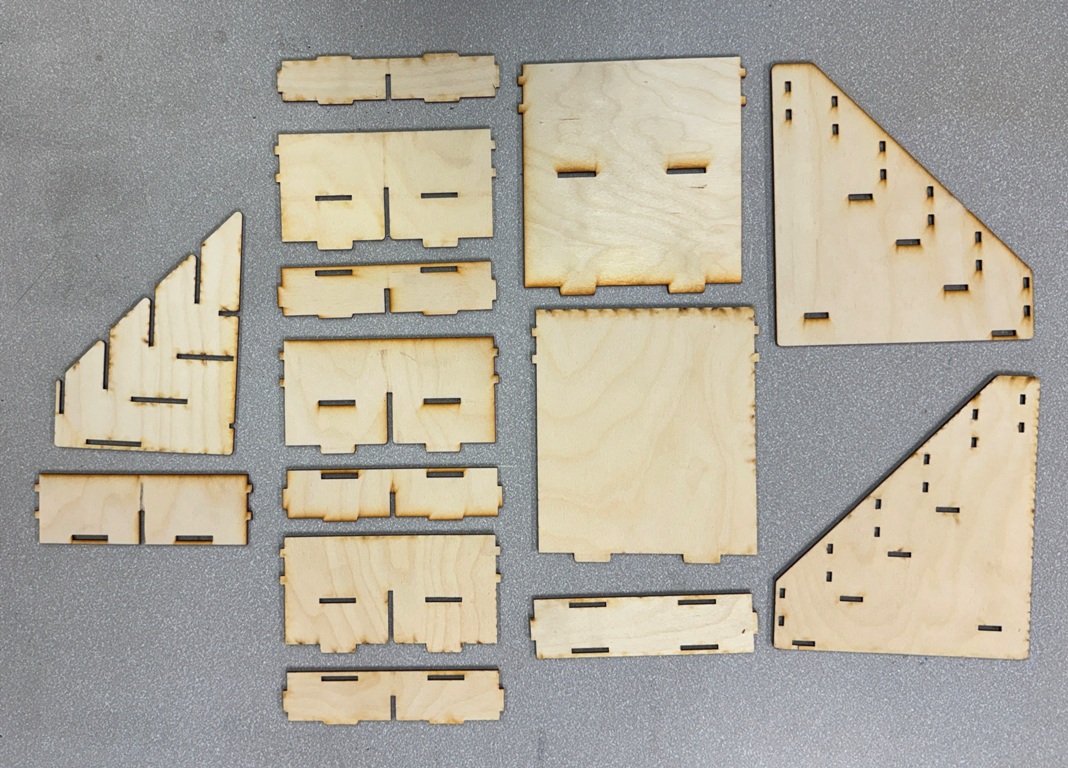
Here area the parts for tray 2. It helps to sort and lay the parts out like this. You will be using the part from the left to right, bottom of a column to the top. Note, in the second column, from the bottom up the first 6 parts are in pairs and they are the same, the top piece is different. It is best to dry fit all the pieces together first. Most of the pieces interlock and do not require glue. |
|
|
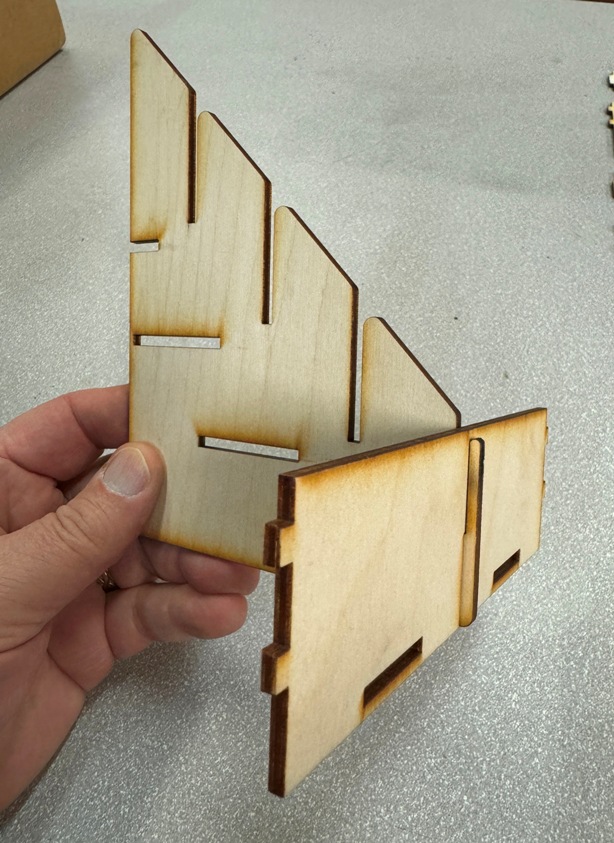
Assemble the first two pieces as shown, this is the bottom front of the tray and the middle divider. We will be assembling the tray from the front to the back. Then adding the sides. |
|
|
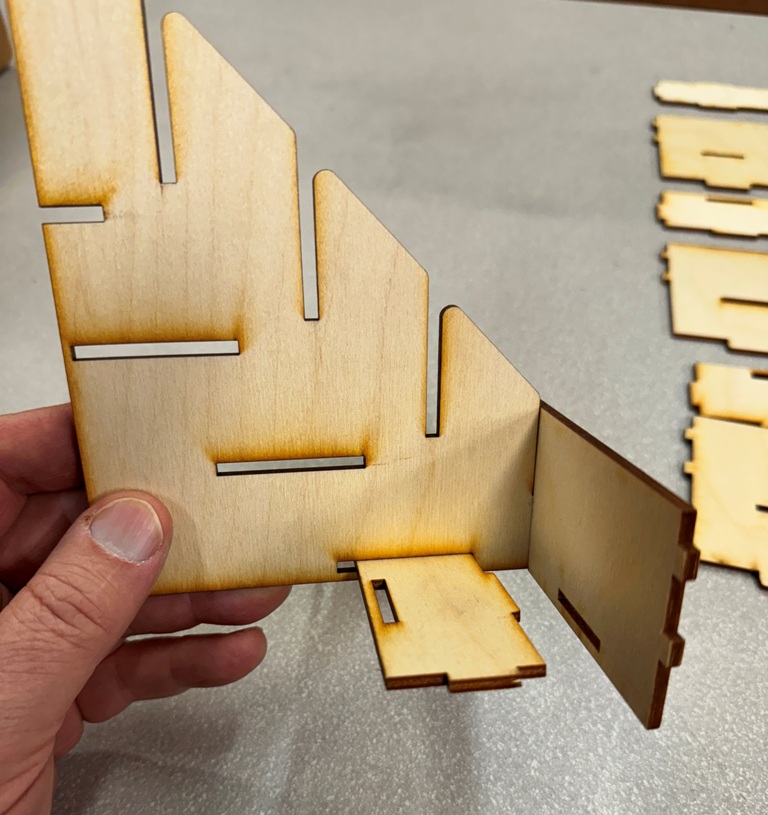
The next piece is the bottom of the first row. It slips into the slot in the middle divider. |
|
|
Then slip the piece forward and into the slots on the front piece. This will "lock" the front piece into the assemble. |
|
|
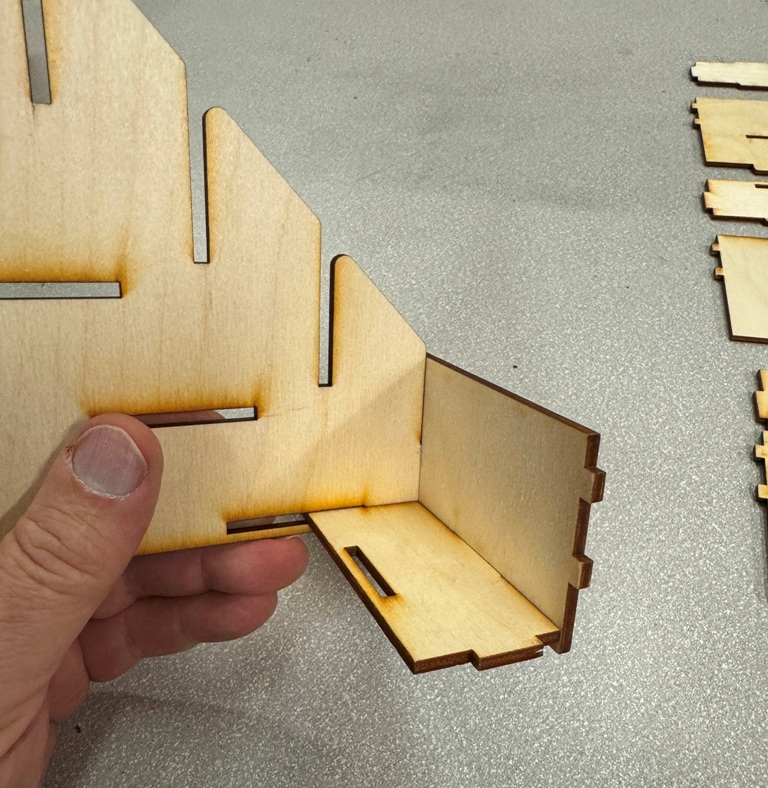
Slide the next piece down from the top, the tabs on the bottom go into the slots on the bottom piece. This will lock the bottom piece into place. |
|
|
This shows how the piece looks when slipped into place. |
|
|
Repeat this sequence for the next four pieces. This what it should look like when you are done. |
|
|
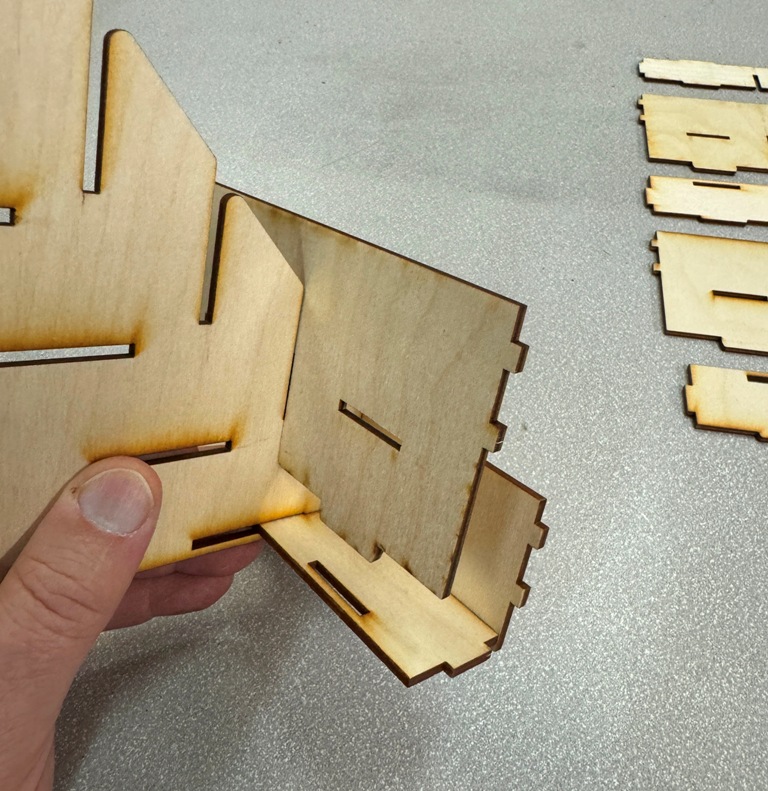
Next is the front and bottom of the tall slot in the back row. Slip them together as shown. |
|
|
These two pieces are then placed on the assembly as shown. |
|
|
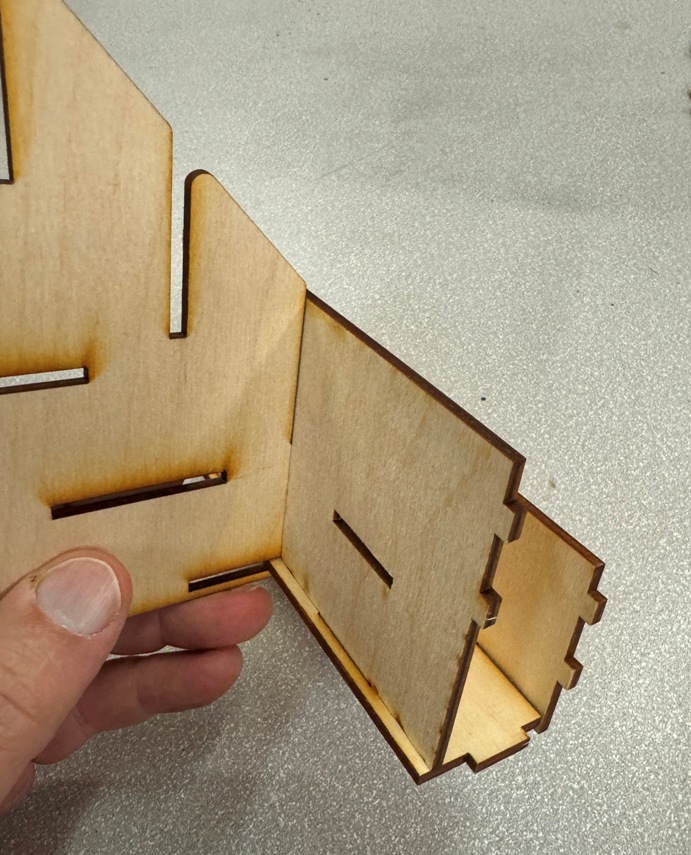
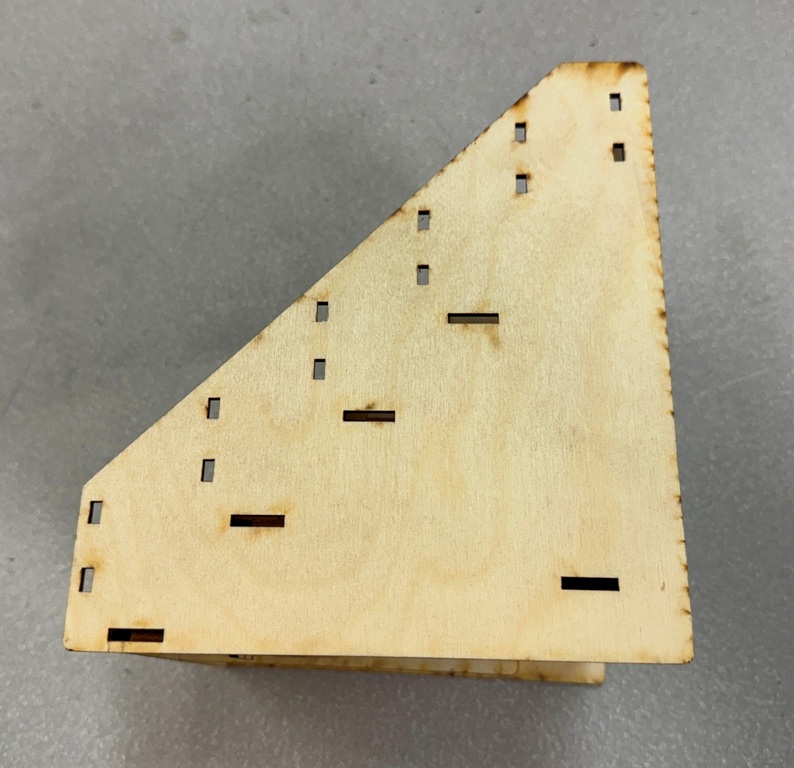
Add the back of the last row as shown. I like to place the assembly on a table on one side. Note there is a little notch where the bottom of the last row slips into the middle divider. |
|
|
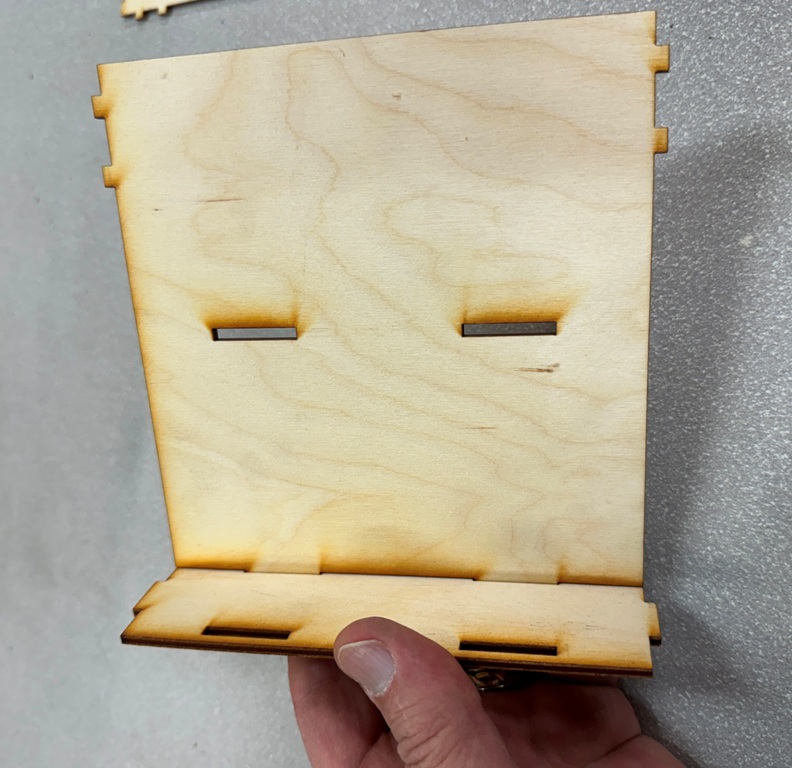
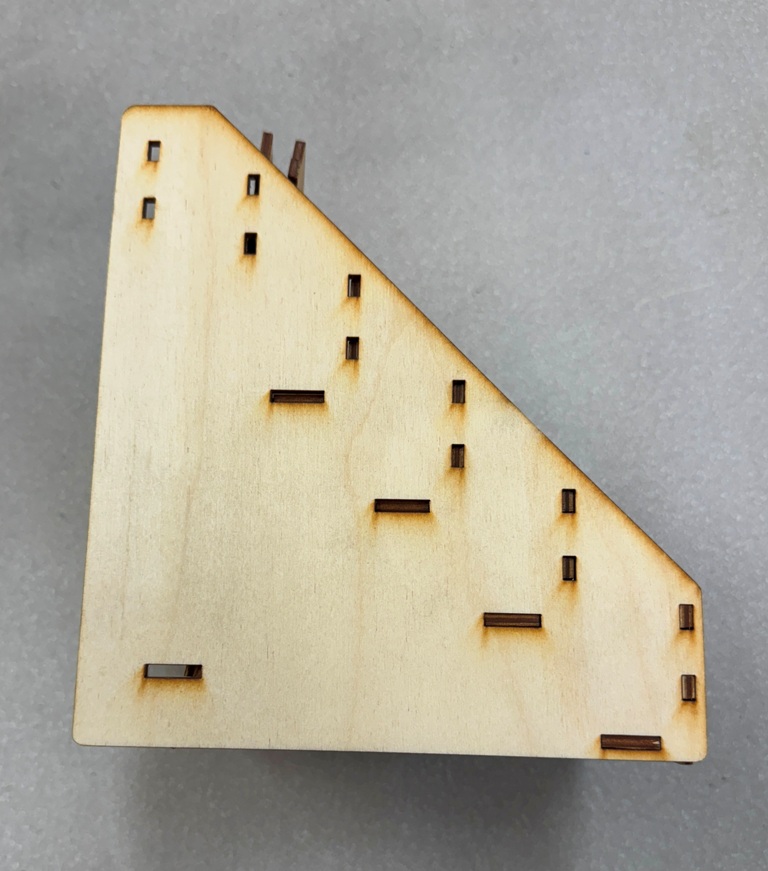
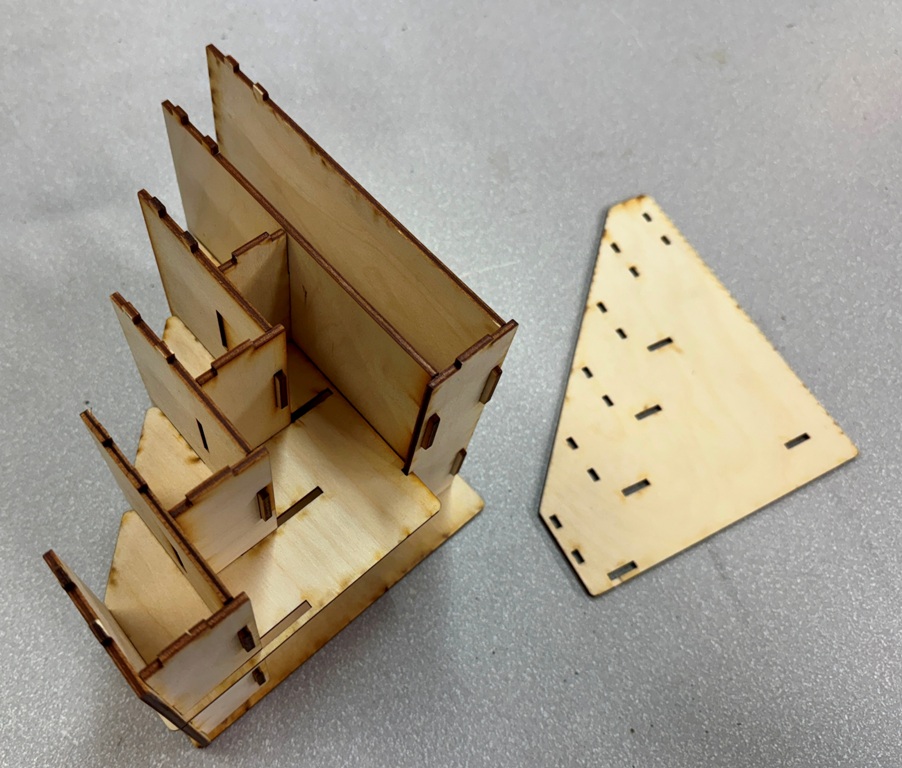
Now place one side on the assembly. You have to work each tab into a the correct slot. I find working from the bottom front towards the back top is easiest. Fitting the two sides on it the hardest part. |
|
|
Now carefully flip the assembly over and place the side down. |
|
|
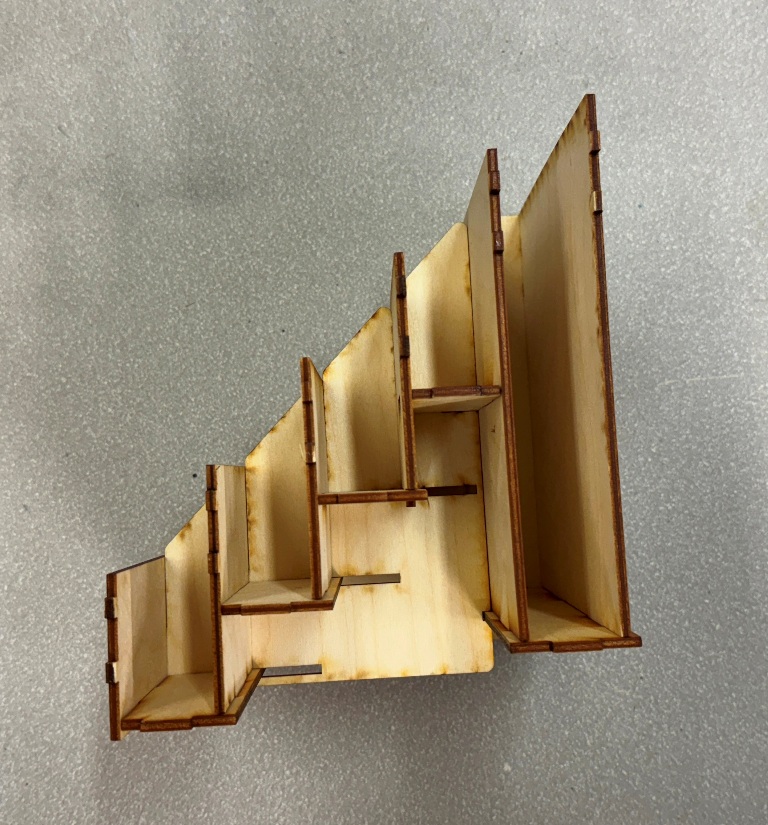
Repeat the process with the other side, working the tabs into the slots from the front bottom to the top back. |
|
|
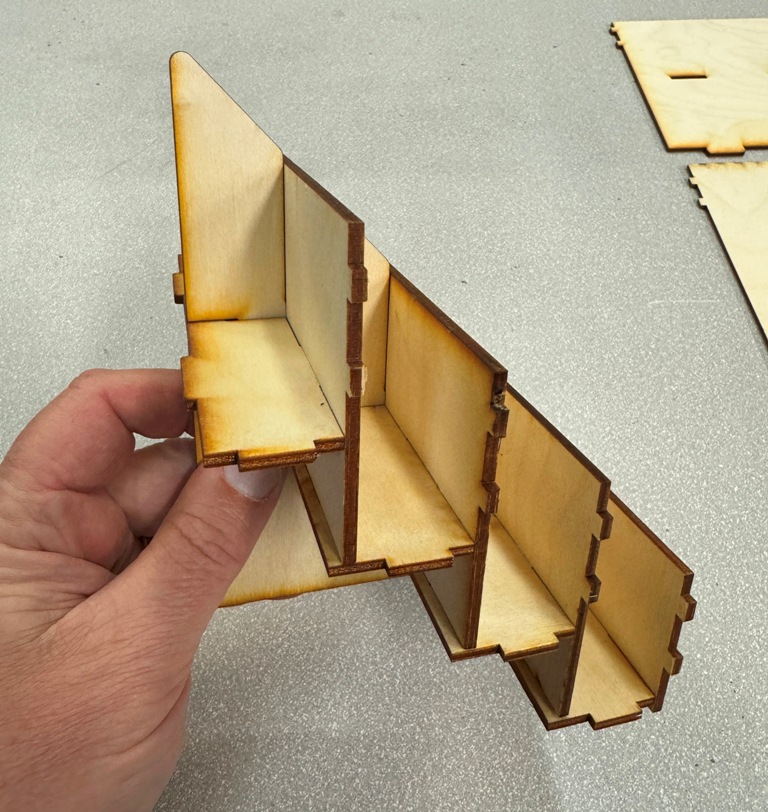
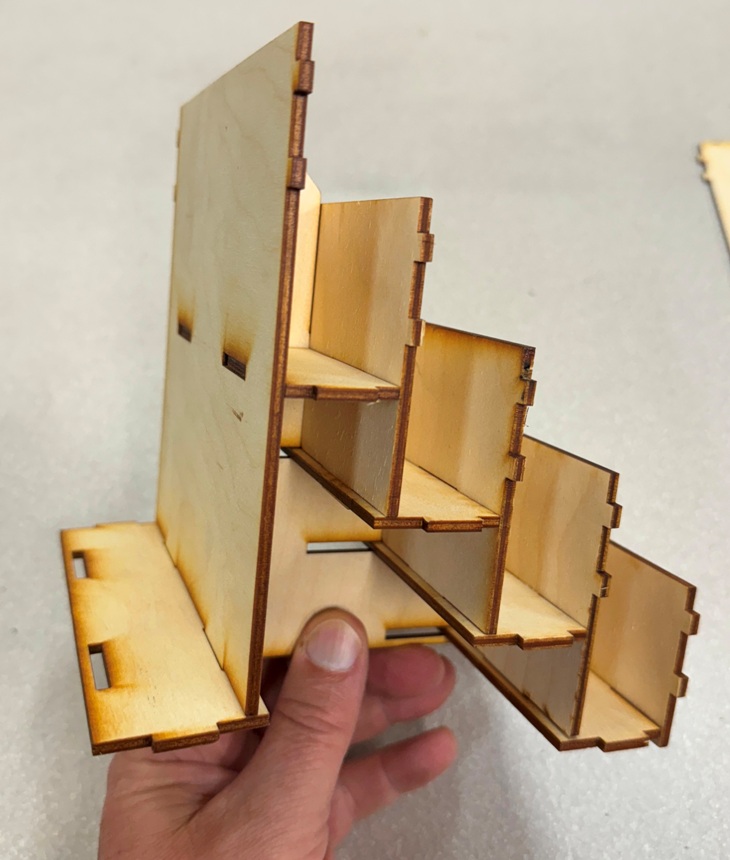
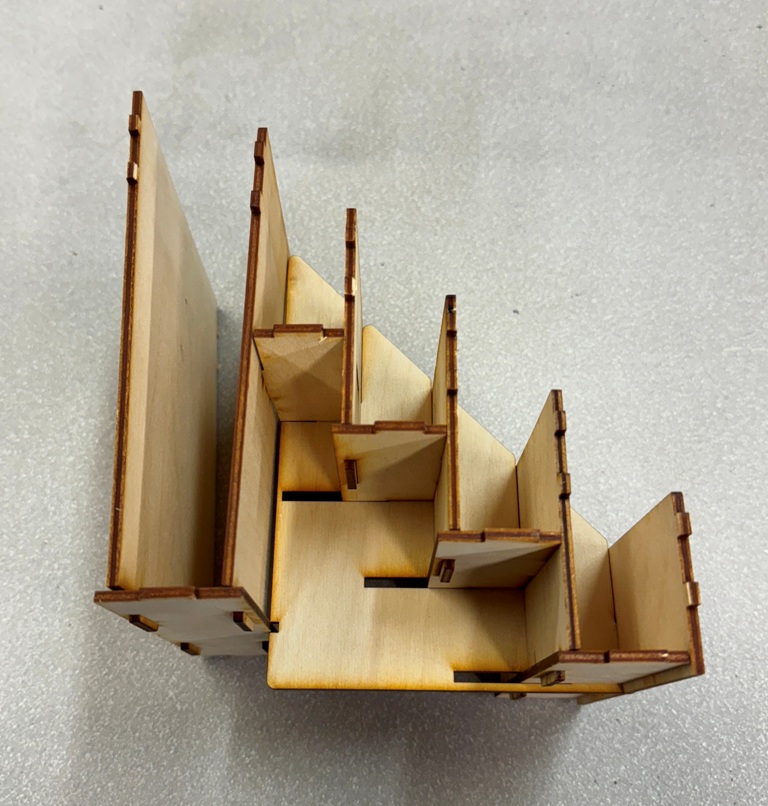
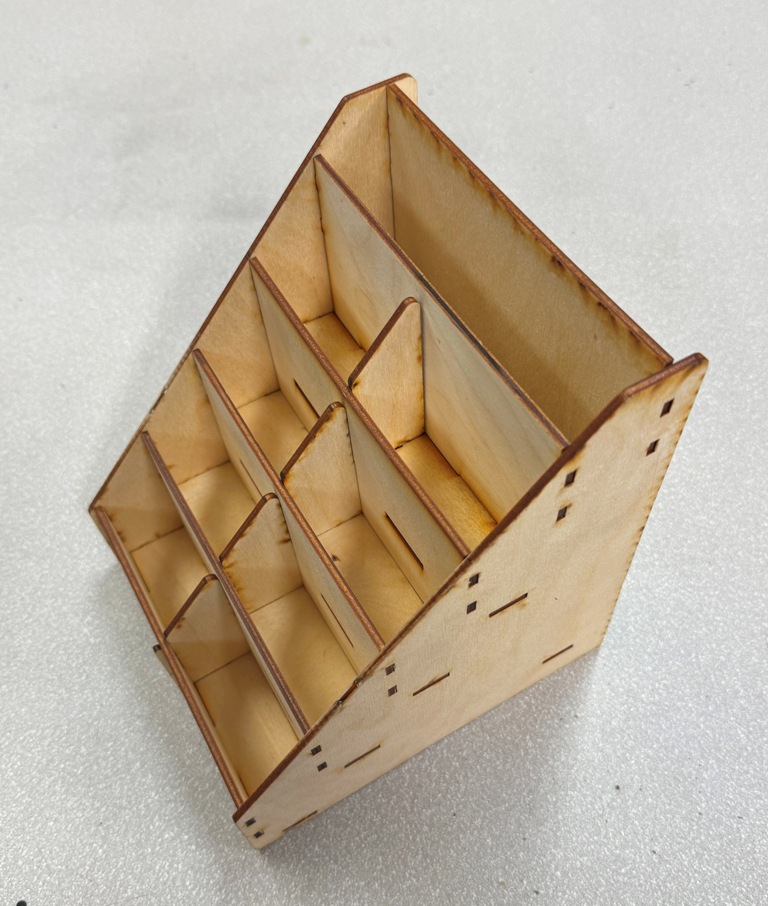
This is what the assembly should look like. At this point the sides will just fall off so be careful with it. But, in general all the pieces are "locked" together. |
|
|
Now remove one side and apply glue to all the exposed matting surfaces. I really like Aleene's Tacky Glue, you can get it at Michaels, Amazon, or many other stores. After you have glued the first side on, carefully flip it over and repeat with the other side. Let the glue dry and you are ready to play. |
|
Ordering
To place an order send an email to orders@prawndesigns.com . Include a list of what you want to order (Part Number and Description) and your shipping address. We will get back to you with an estimate of when we will have your order is ready to ship and shipping costs.
Some items are available in the Prawn Designs Etsy Store.
Please read the Laser Cutting and Engraving FAQ page for details on laser cutting and engraving side effects.
Shadows of Brimstone Card Trays Price List
| Part Number | Title and Description | Price | Image |
|---|---|---|---|
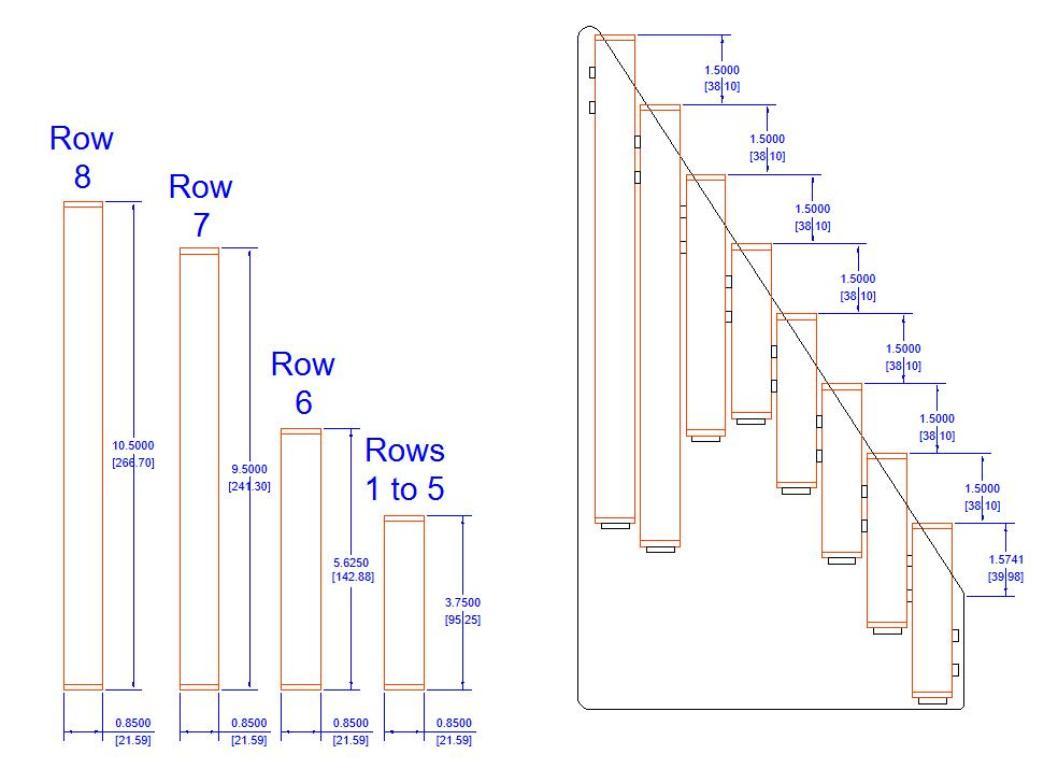
PD-11271 |
Shadows of Brimstone Tray 1 Kit
|
$50.00 |
|
PD-11272 |
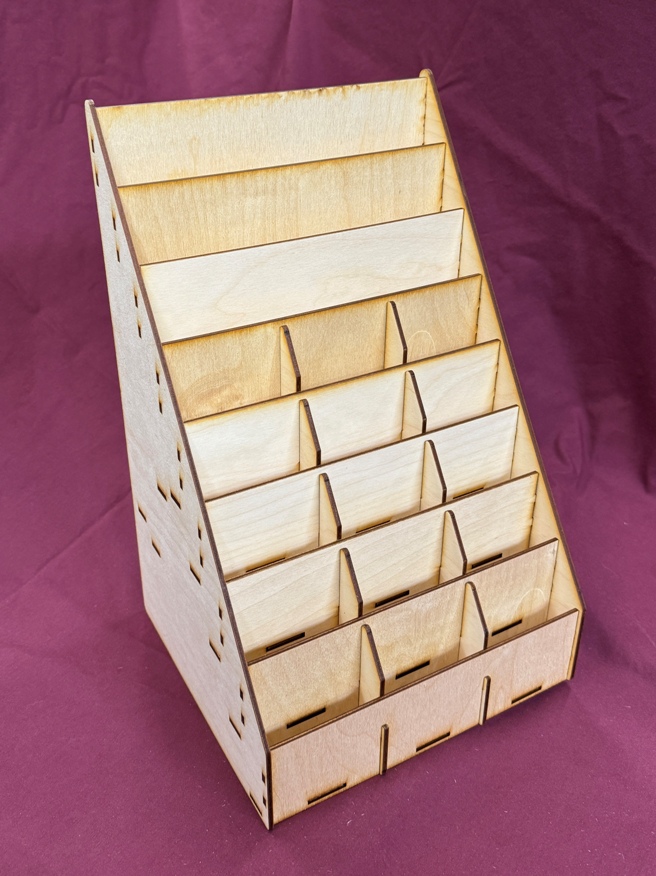
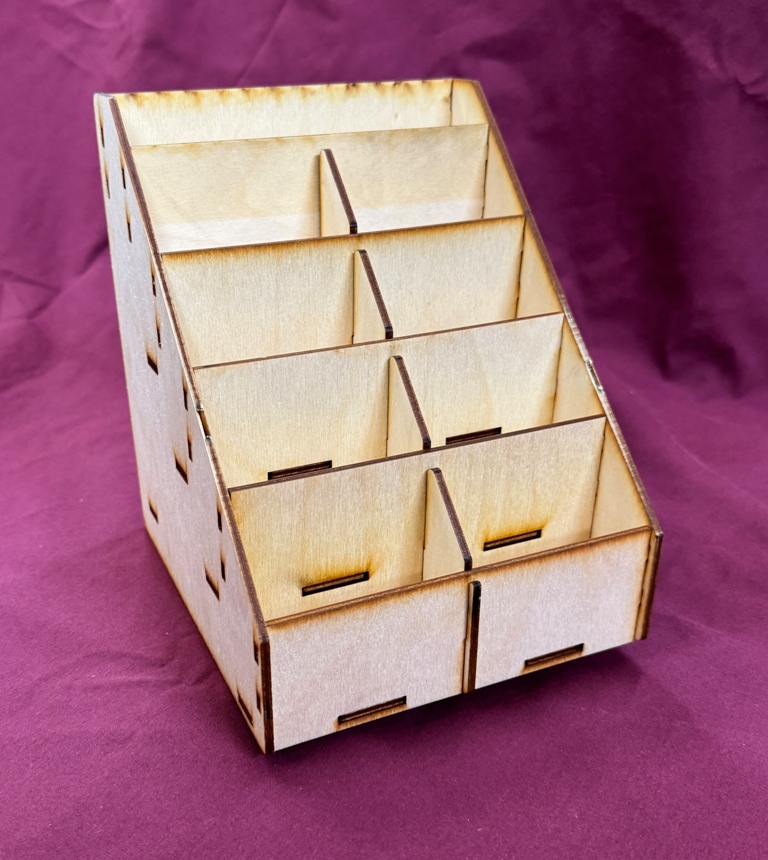
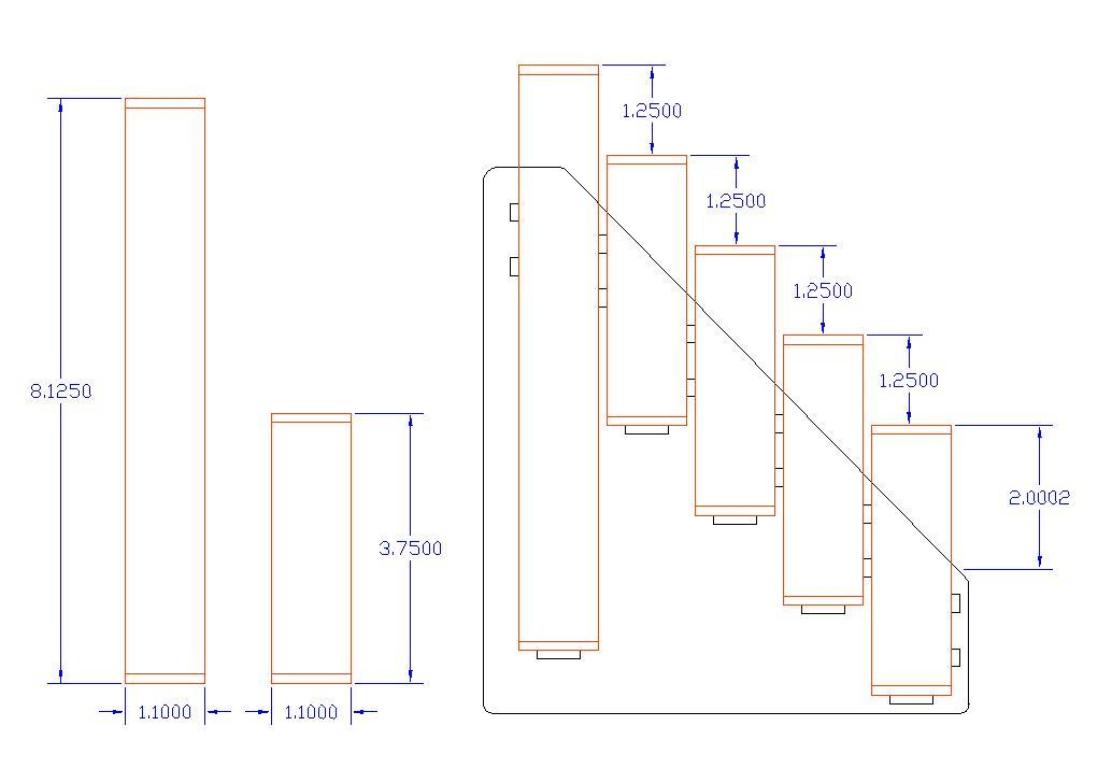
Shadows of Brimstone Tray 2 Kit
|
$25.00 |
|
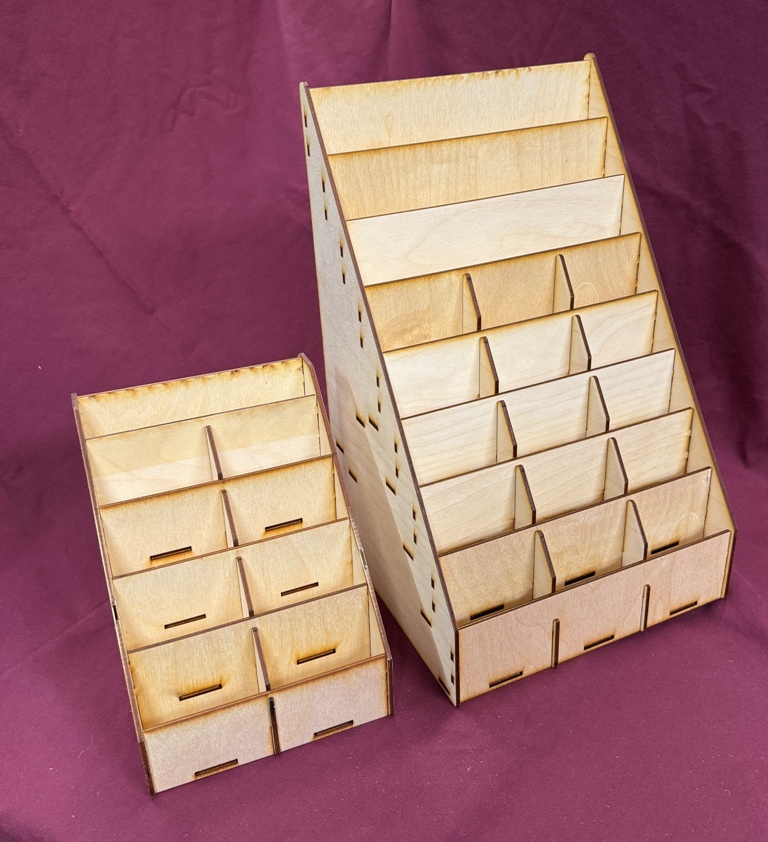
PD-11276 |
Shadows of Brimstone Tray Kit SetThis set includes two kits, one each of PD-11721 and PD-11272 |
$70.00 |
|
Ordering
To place an order send an email to orders@prawndesigns.com . Include a list of what you want to order (Part Number and Description) and your shipping address. We will get back to you with an estimate of when we will have your order is ready to ship and shipping costs.
Some items are available in the Prawn Designs Etsy Store.
Please read the Laser Cutting and Engraving FAQ page for details on laser cutting and engraving side effects.
Disclaimer: This is an accessory for the game, not a replacement. You will need to have a copy of the game to play. This project is in no way affiliated or endorsed by the publishers or trademark holders of the game.